Tuesday, May 22, 2012

DIY Sheets for a Pin Trading Binder!


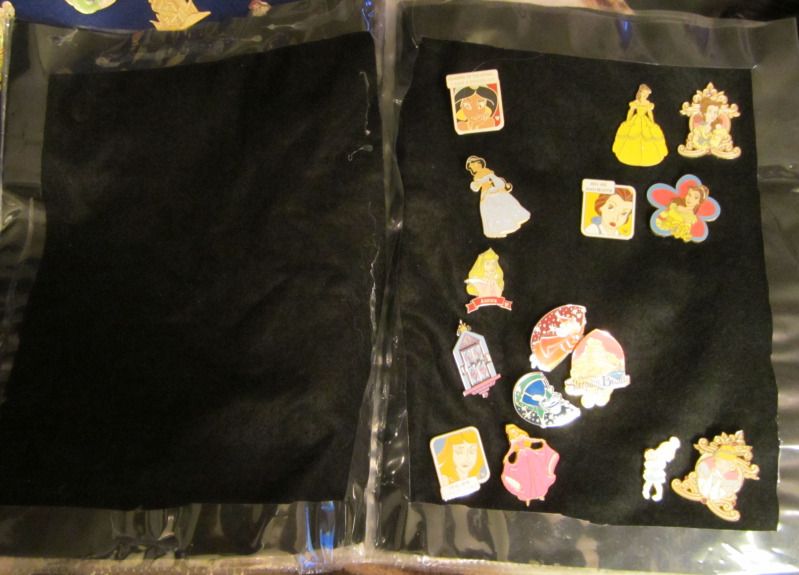
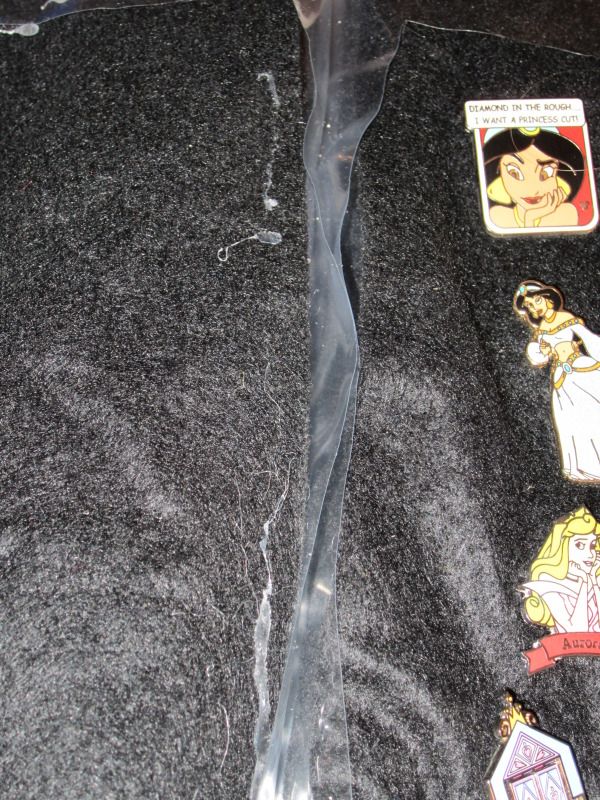
So, a few years ago on a trip to Disneyland with my best friend, I was introduced to the world of Disney Pin Trading. It did not take long for me to acquire a large enough collection to need a way of keeping them. I decided on a binder. My first attempt at pages for the binder ended in a hot mess. I used them anyways, but I wasn't happy with them. The hot glue I used to try to meld the plastic and felt didn't really work well. It mostly melted the plastic without sticking to the felt, so the felt sheets would come out, as you can kinda see here. I knew there had to be a better way. 

So when I was invited on another trip to Disneyland (just a couple weeks now!), I got out my binder and figured it was time to update it. And I'm sharing how I made my new sheets with the wild, wild internet! This tutorial assumes you have some basic sewing knowledge, and/or have available resources for what you don't (mentors, books, other online tutorials...).


The New Sheets!


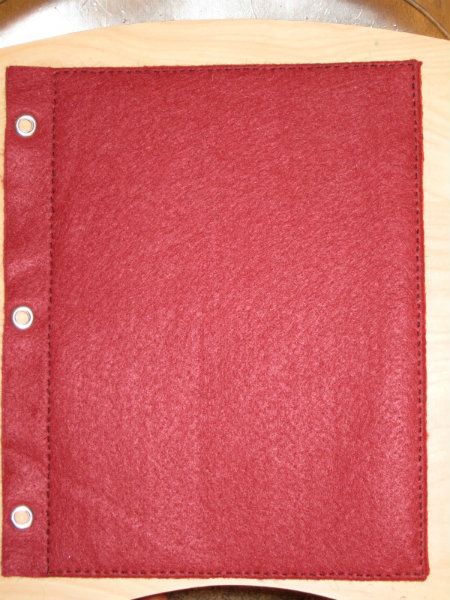
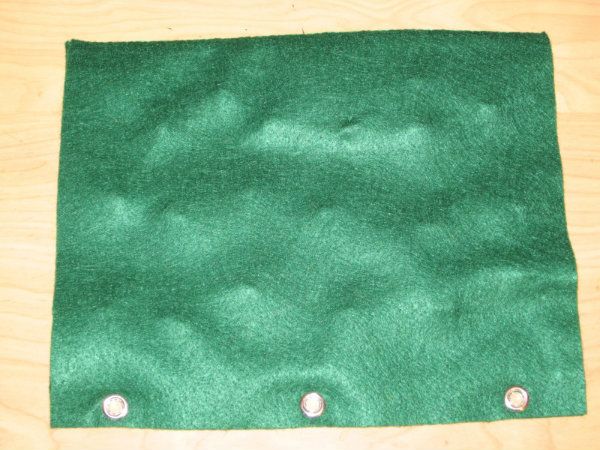
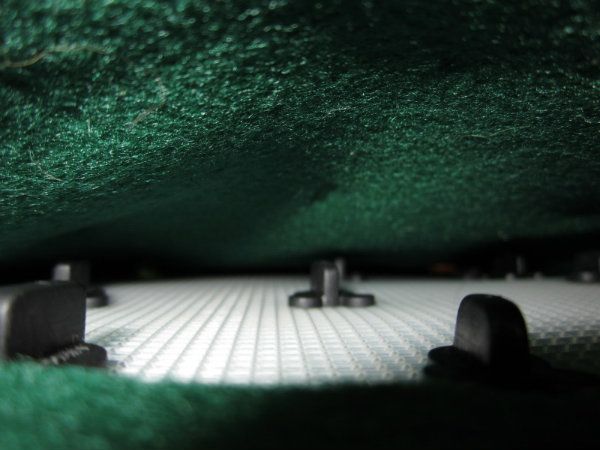
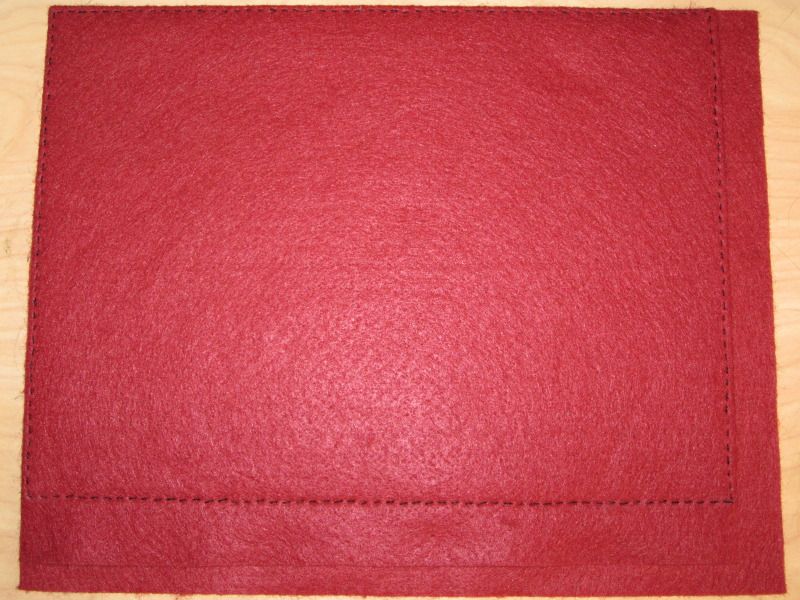
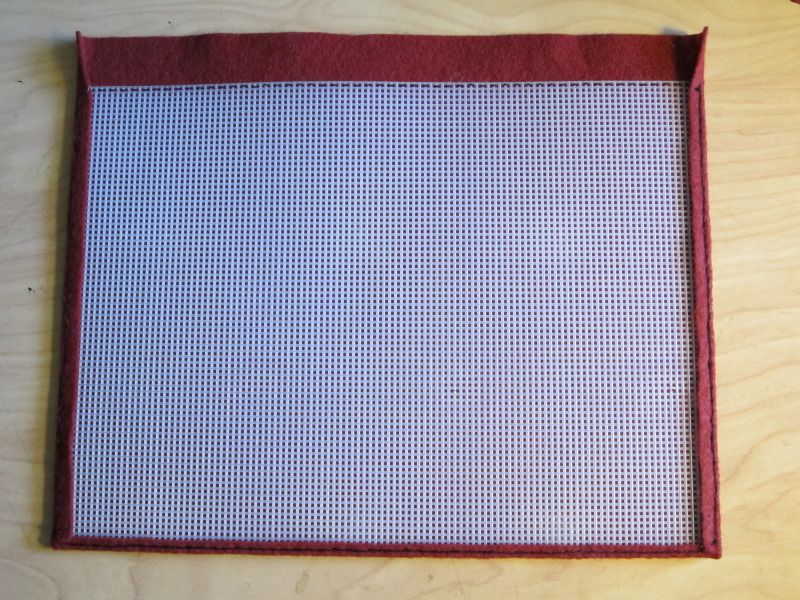
These sheets are quite sturdy. Plastic mesh with felt on both sides, and reinforced eyelets to go in a binder. The plastic mesh provides stiffness to combat the weight of the pins. The felt stretched across the front of the mesh provides an ideal background to display the pins. The felt on the back is only attached along the vertical sides, allowing for space to put the pin backs so that the don't damage the pins on the sheet behind them (especially important if any of your pins have metal backs). These should last a good long while!


The Materials!


Now, the numbers on this list are per sheet! Multiply up by however many sheets you want. (I've made eight of these in a range of colors!)

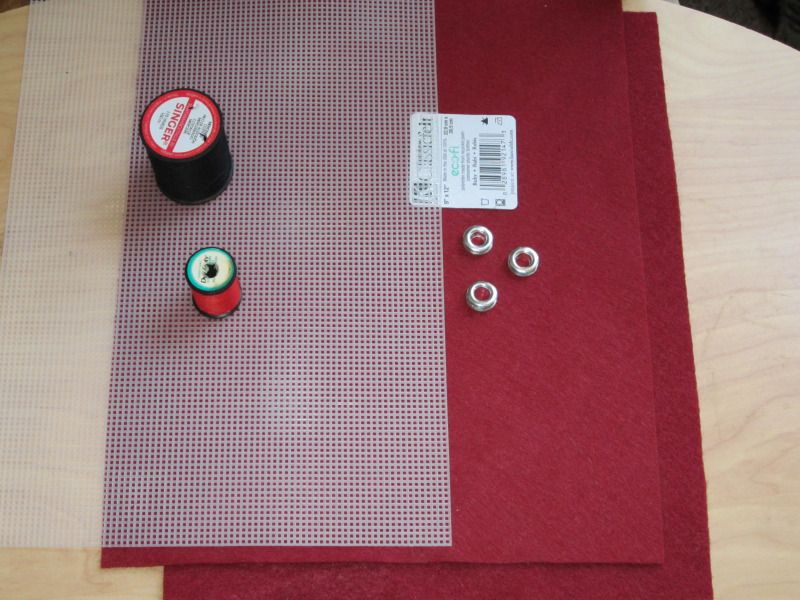
-Two 9"x12 sheets of felt
-One sheet of plastic mesh (found in the cross-stitch section), cut down to 8"x11". (I used 10-guage mesh.)
-3 sets of large eyelets (1/4", or 6mm)
-Thread in whatever color you want. It should be a touch darker than the felt if you want it to blend, or you can chose different colors to pop.


How to Make Them!

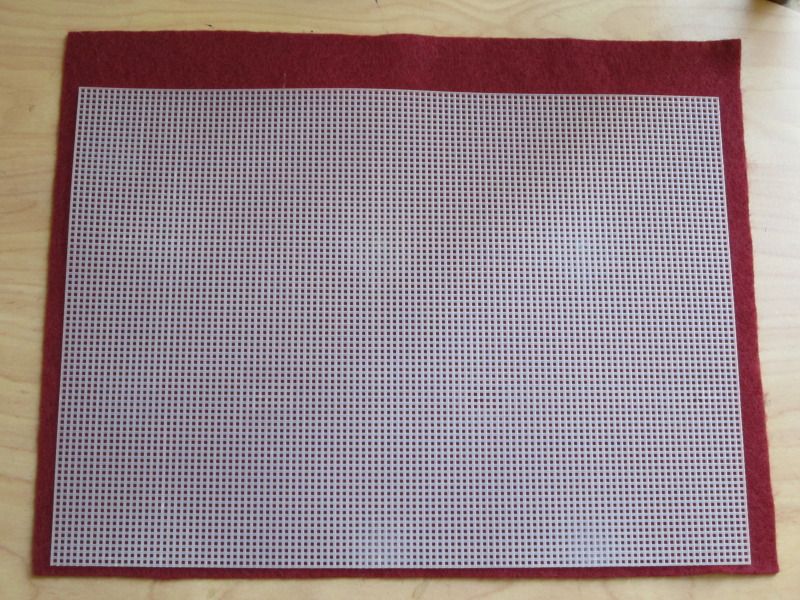
  1. Put the plastic mesh on the top felt sheet and make a narrow hem along one side.

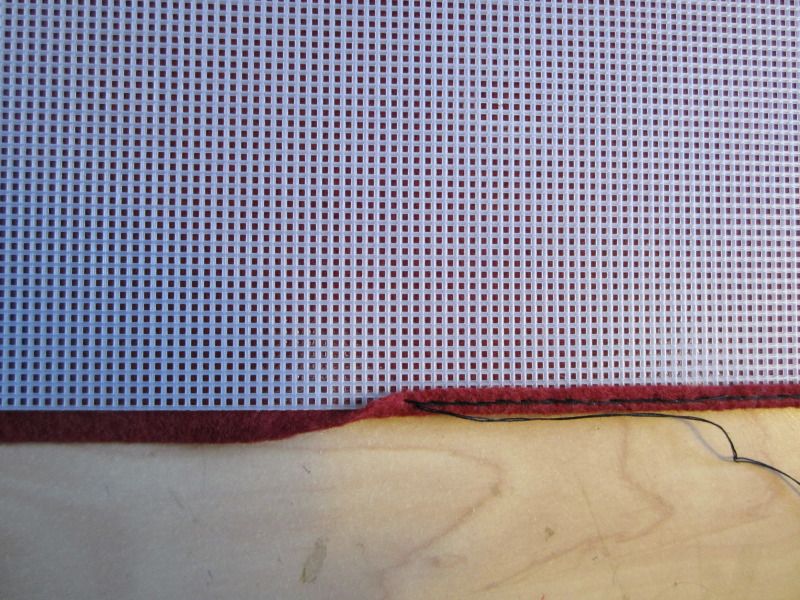
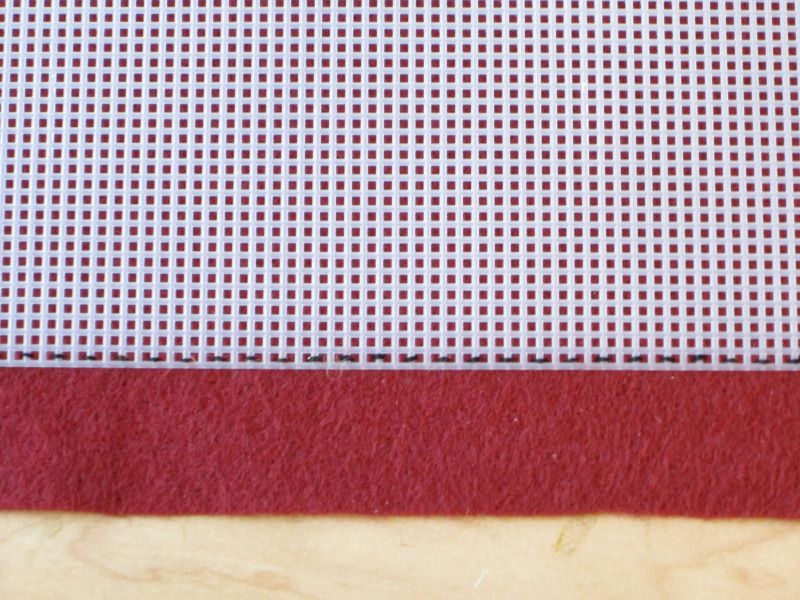
You want to set the plastic mesh on the felt sheet so that it is roughly centered the long way (it doesn't need to be perfect), but offset on the short way. This provides enough room along one long side for the eyelets so that the sheets can go in the binder. Now, along the other long side, you'll want to sew down a narrow hem, with the felt just less than two mesh holes wide. I sewed it down using a backstitch, though I spaced it out so that from the front it would look like a running stitch with the thread passing through each mesh hole along the end. The stitches also go through the outer-most row of mesh holes, which I did all the way around. I chose the backstitch to add some reinforcement to hold the edge of the felt down.

2. Secure down the other long edge.

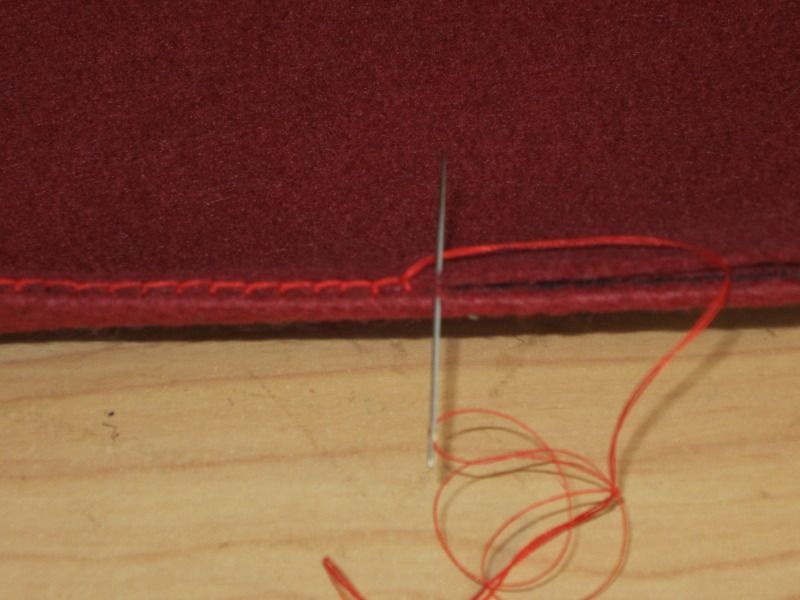
I did this by actually doing a running stitch to visibly match the other stitching. It only needs to hold the mesh to the felt. Here's a closeup.

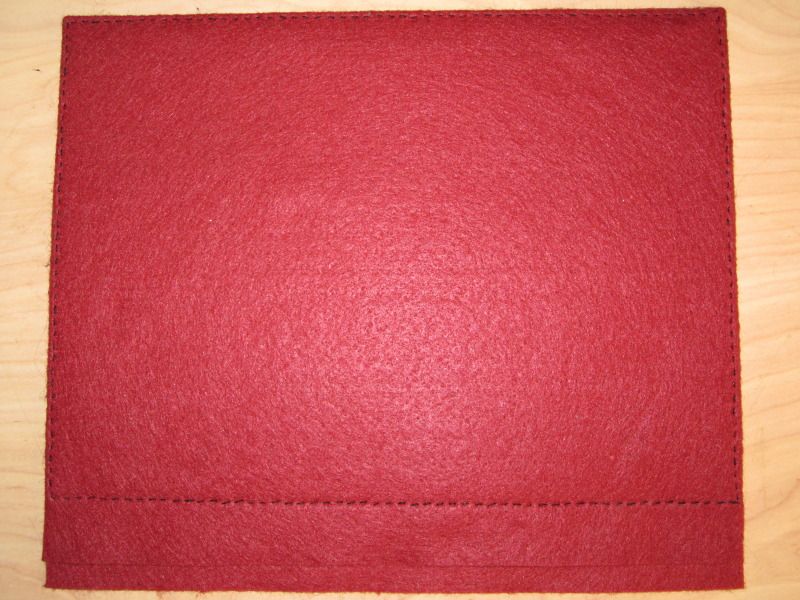
3. Sew down the top and bottom of the felt to the mesh.

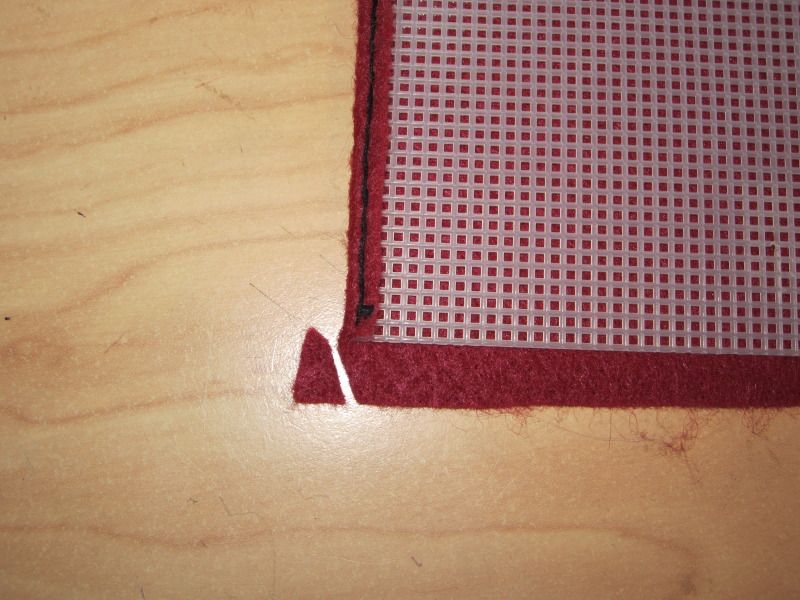
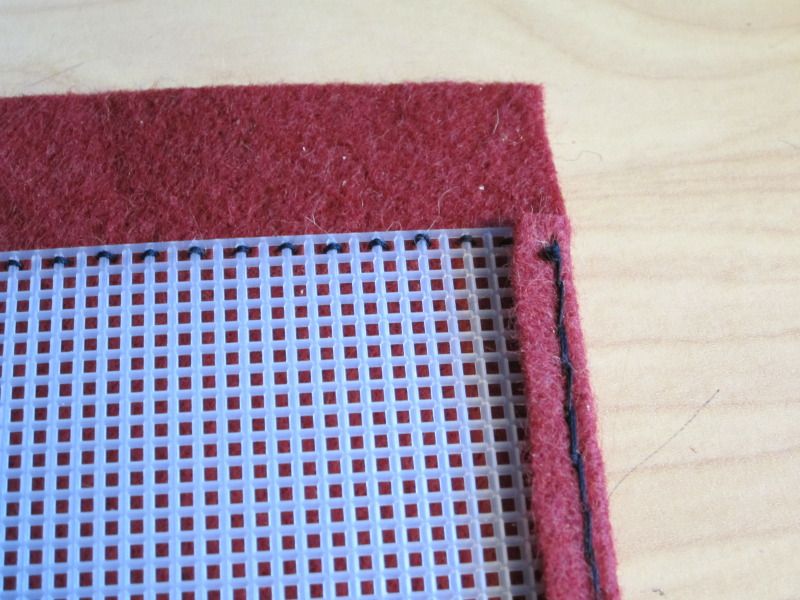
I start by trimming down the corners on the narrow hem side, to minimize bulk at the corners. Here's what the piece I cut out looks like. I then fold down each edge and sew it using the same backstitch I used for the narrow hem. Once that's done, it will look like this. Excess fabric then gets cut off the last two corners, so that they end up looking like this. The front piece is finished!

4. Prepare and sew down the back sheet of felt.

First, you'll want to place the second piece of felt under the prepared front, lining up the top and narrow hem edge with the felt. Then you'll cut along the bottom to match the lengths, though leave the other edge untouched! You want some extra width on the back, as that provides a pocket for the pin backs to go in. Then you'll sew the front and back pieces together along the narrow hem edge. I used a blanket stitch to do that. Only sew the one side, though!

5. Finally, add the eyelets!

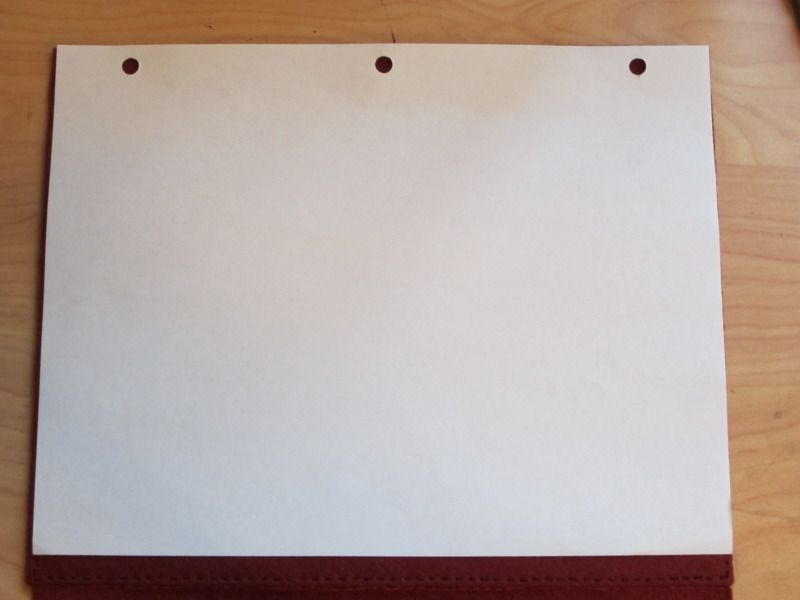
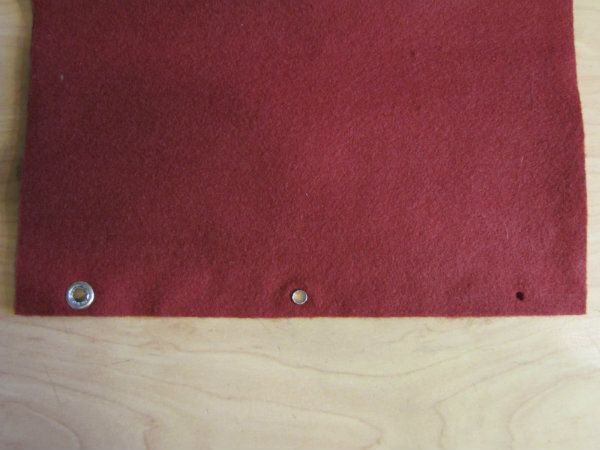
I used a sheet of paper with holes punched out by a three-hole punch as a template for creating starter holes in the edges along both the front and back pieces of felt. I actually used thin DPNs (size 1 or so) to create a small hole in the center of the holes in the paper, and then used small, sharp scissors to cut out small holes (though not quite as big as the holes in the eyelets). The pieces were then able to line up evenly. Next, follow the directions for applying the eyelets you have. Now it's ready for your pins! :)

Friday, June 18, 2010

Turtle Power!

*Sings* Teenage mutant ninja turtles, teenage mutant ninja turtles, teenage mutant ninja turtles. Heroes in a half-shell, Turtle Power!

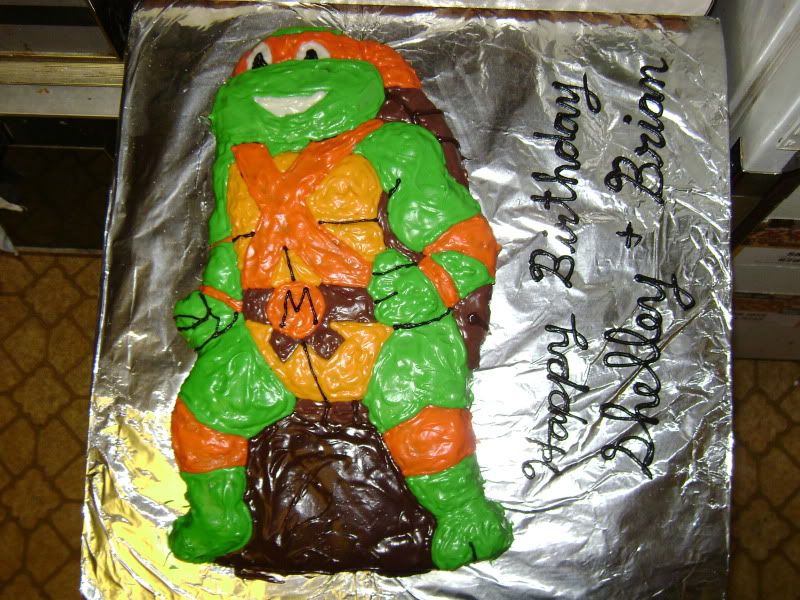
Okay yes. I grew up in the midst of Ninja Turtle Mania. My brother and I would fight wars against each other with our Ninja Turtles as soldiers. We owned several of the episodes on VHS, and the first two movies. We also have a Ninja Turtle cake pan and cookie cutters. Yes, even those!

And I just used the cake pan tonight for a birthday cake to take to Mom's work tomorrow. It's her birthday, as well as the birthday of another guy that works there. And hey, the cake was requested!


And that's my best shot at decorating it. Took me between three and four hours, and one of those extra-tall tubs of frosting, plenty of gel food coloring, and pre-colored black frosting. The cake itself is just a dark chocolate fudge cake out of a box, nothing special. And my cousin mentioned wanting one for her birthday next month... We'll see. :D

Saturday, May 29, 2010

More gardening!

Did more work, got more pictures!

First off, I got pictures of the rest of what I planted for my grandmother.


That's her cherry tomato. I forget what variety it is off the top of my head. And in the pots are basil and parsley. They were supposed to end up on the front porch, but she hasn't wanted them out there yet... (Yes, I've reminded her/asked. She wants to leave them where they are for now.)

And on to the big project for today, planting the rest of my seedlings! (And doing a few other things.)


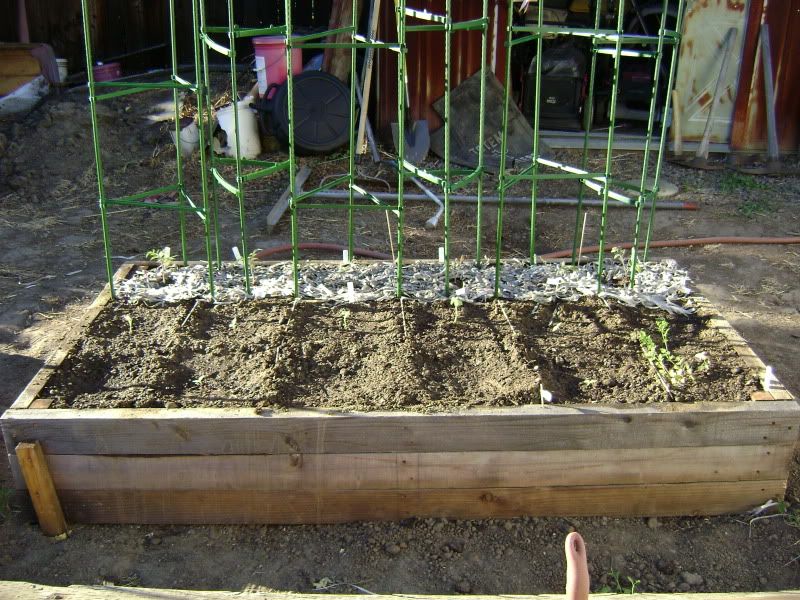
The Box #1! I'm trying square foot gardening in this and #2, but it's much more readily apparent here. The boxes are about 6'x3'. And in this box we have... (from left->right, front->back)

Basil (seeds just planted today), Anaheim pepper, okra x2 (seeds just planted today), Bell pepper, cilantro.
Jalepeno pepper, Anaheim pepper, okra x2, Bell pepper x2.
San Marzano tomato x3, Better Boy tomato, Early Girl tomato, Sweet 100 tomato.

I sunk the tomatoes and okra when I planted them (meaning, I deliberately planted them deeper than where the soil was in the previous container. Certain plants can grow roots off of what was the stem when you do this, which gives the plant a bigger and better root system). I dug down nearly to the bottom of the raised beds for the okra and most of the tomatoes! And also, I found some bone meal today, so I put a scoop of that in the hole for each tomato before I set it in. That should prevent them from getting Blossom End Rot when it comes time for them to fruit. As you might be able to tell, I'm using shredded newspaper for mulch. And I've only partially done the mulching... I'll put much around the rest of the plants in the box on Monday.

And as another note, I used one of those biodegradeable 4" pots for the seedlings. Like peat pots, but harvesting the fiber for the pots I got was supposed to be better for the environment than harvesting peat for peat pots. And the tomatoes were already sending their roots through the pots!

And, well, when I was starting the tomato seedlings, I started eight of them. Check, there's six in the box. Where'd the other two go?

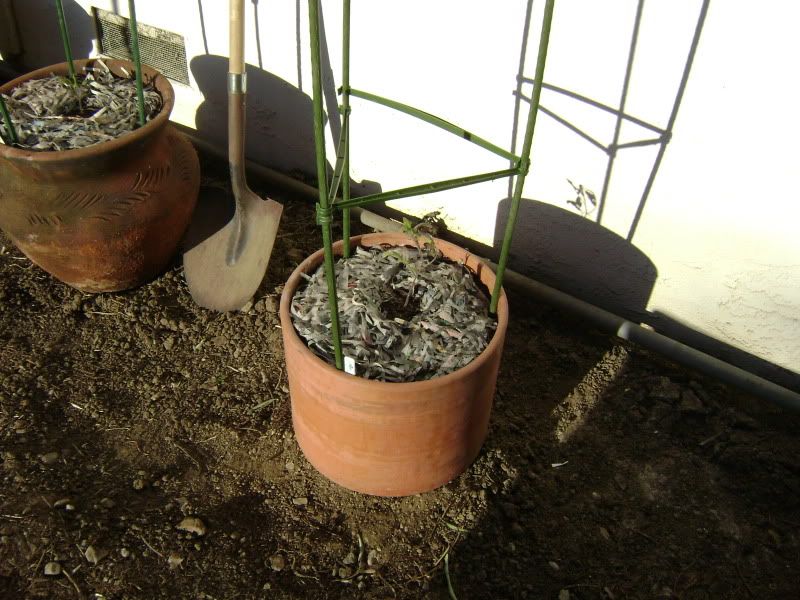
Answer: here.

(Forgive the shadows, it was late in the day.)

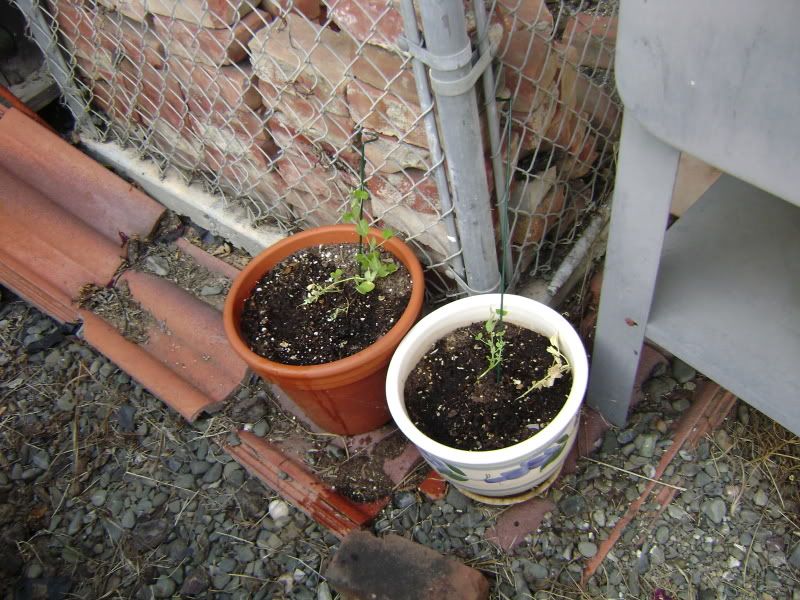
These two clay pots were an AWESOME find for free. Every year my grandma's city has a "Clean Up Week", where residents put an unlimited amount of what they want to get rid of, no size restrictions, on Saturday and Sunday, and then Mon-Fri the city comes and hauls everything off. This is also a good time to troll around the streets looking for treasure in someone else's trash. That's what these were, though we had to pull plants out of them. We got a bunch of other planters, but these were the crown jewels of our haul. And now they're holding tomatoes.

The larger pot (here) has another Better Boy tomato in it. The smaller pot (here) has another Sweet 100. Aren't they purty?

I also put a sage and marjoram seedlings in the back corners of the bean box, but I didn't take a picture of them.

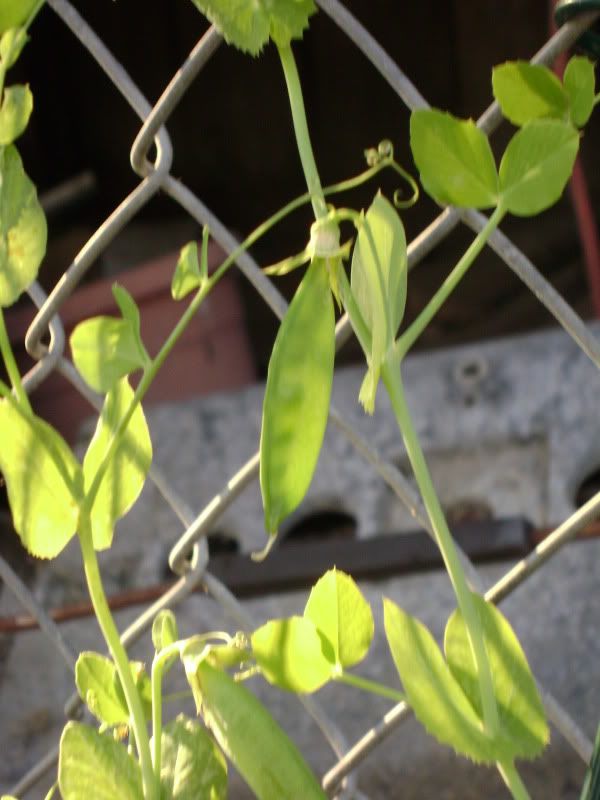
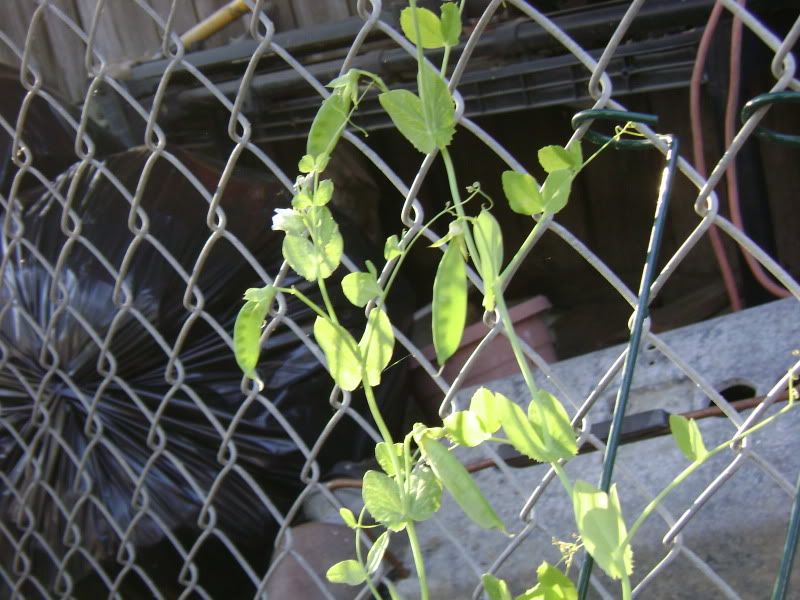
And just because I noticed the affect the light was having on the peas on the way inside... Here and here.

Friday, May 28, 2010

Gardening!

Okay, so sorry that I haven't posted lately. To make up for it, here's pictures of what my garden's doing. Okay, well my garden and my grandma's garden. I do most of the work with her food plants (the landscaping and lawns are on their own systems).

I'll be posting a lot of pictures, but not all of them. Here's the rest of the pics. The ones taken today have 5-28 at the beginning of them.

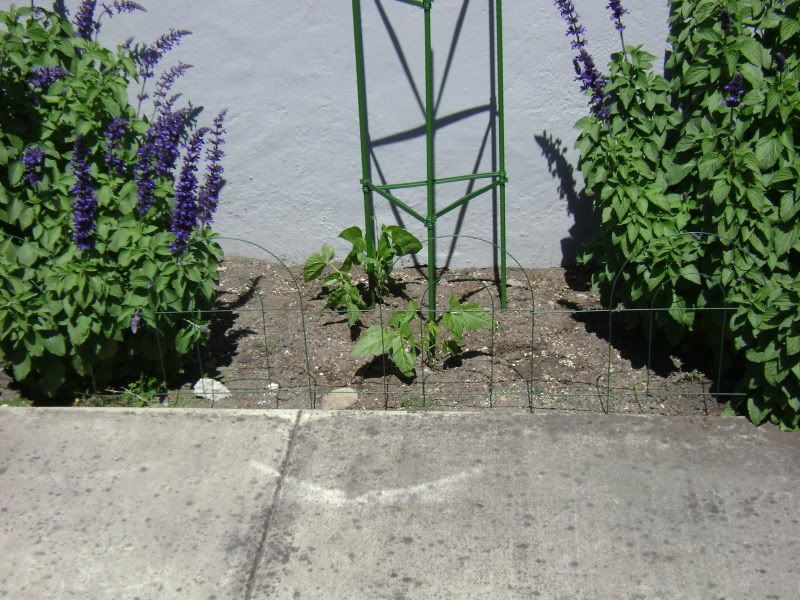
For the ones at my grandma's... Here are her beans. I forgot to get a picture of her tomato plant and herbs, but I can get those later.

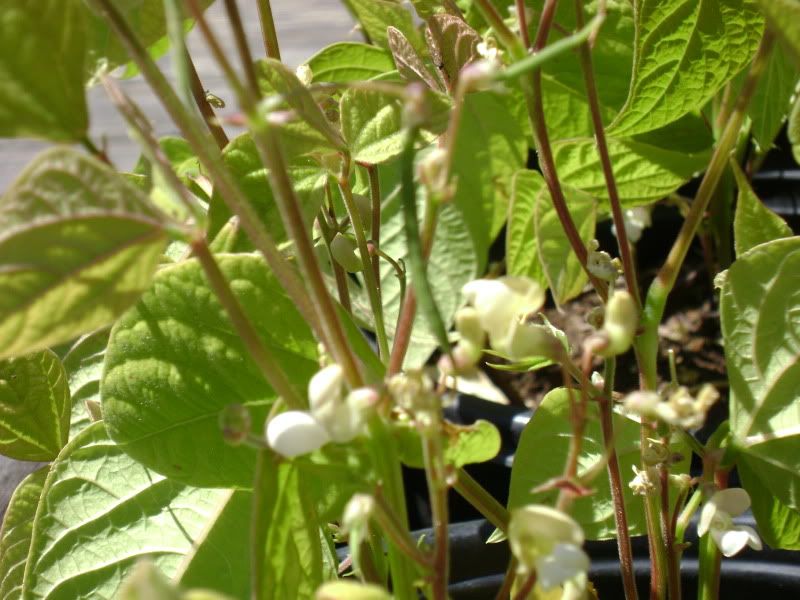
Her bush beans:


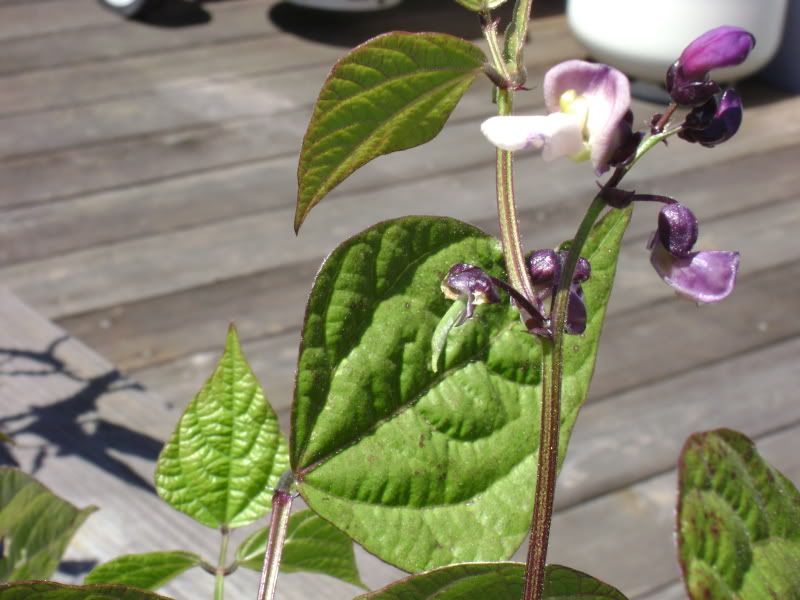
The ones with the white flowers are Beananzas. The ones with the purple flowers are known as Purple Queens. She even has little beans already!


And her Speckled Butter Beans:


We're trying them this year because Grandma was wanting them again. These don't seem to be exactly what she remembers, but it's as close as I can find. And we've had a problem with snails eating them, sadly. :( I've done a second application of snail bait around them, so hopefully they'll have a chance to get a bit bigger before the little monsters come close again.

And now on to the stuff in my garden...

Box #1 is currently empty except for dirt. I've been hardening off the seedlings that go in there (tomatoes, peppers, okra, herbs), and I hope to get them planted this weekend.

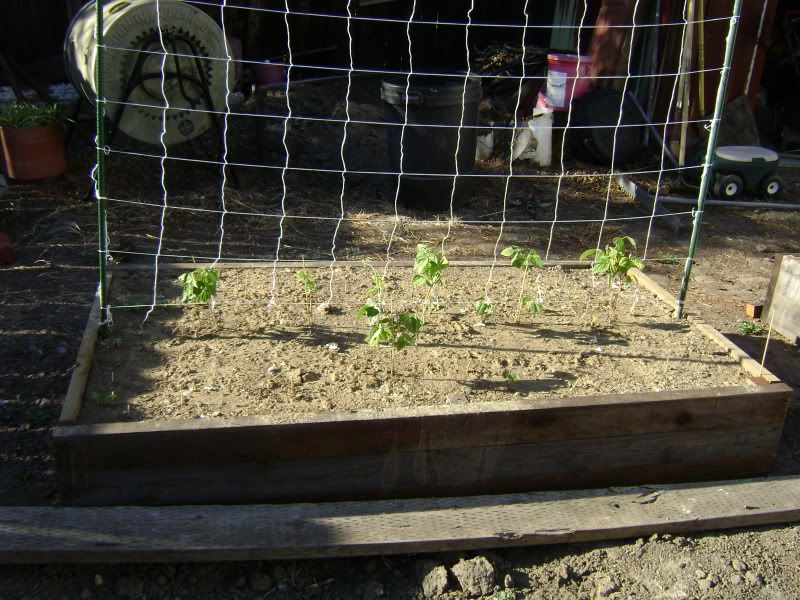
Box #2:


This I'm calling my bean box. Obviously, I'm growing beans in it. I have some Speckled Butter Beans of my own to add to what my grandma's growing (the far right of the box, one I started indoors and transplanted and already with pods, and two more just sprouting out of the ground).


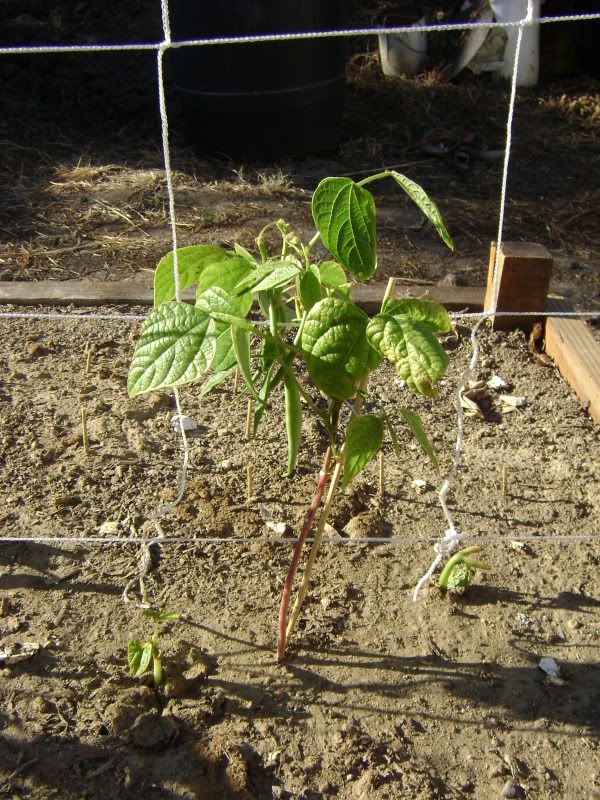
I also have four transplanted pinto beans, and I planted eight more pinto beans, and so far six of the eight have popped up. They look something like this:


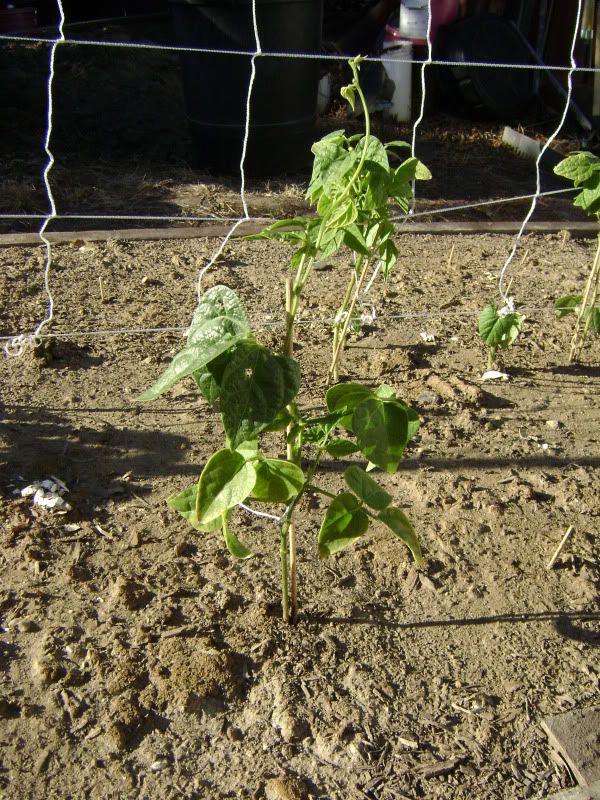
I'm also doing a bunch of bush beans, Beananza and Purple Queen (same as grandma, so we only had to buy one packet of each). Out of them I only had one Beananza transplant, and I have planted six more beans of each, but so far only two of each have sprouted.


I've also planted radishes, carrots, and lettuce in that box. The radishes have popped up, but are in the shadows of the box picture. I've had a couple of the lettuces pop up, but no signs of life from most of them (I also have them behind the beans, so hopefully the climbing beans will protect them from the worst of the sun once summer gets going here). Also no sign of life from the carrots. I live in hope, though. I'll also be putting a couple herbs in the back corners of the box when I do the transplants this weekend.

And now onto Box #3:


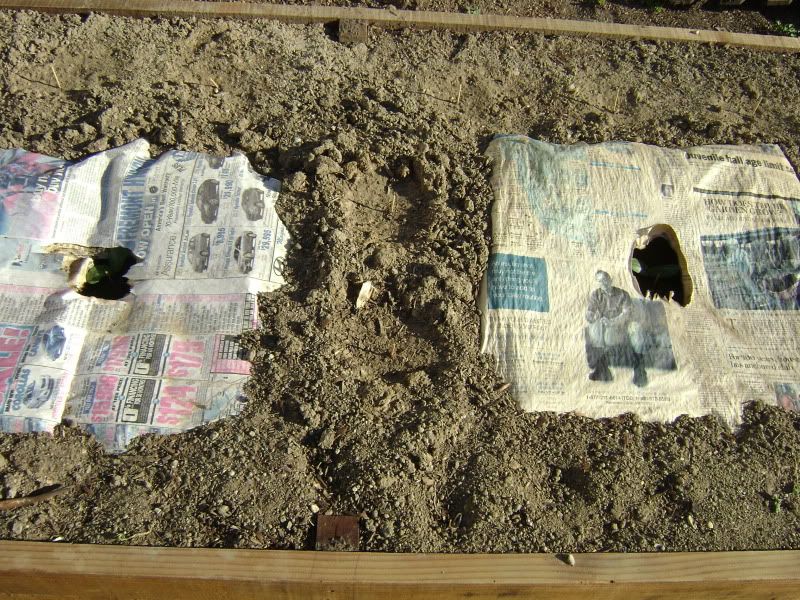
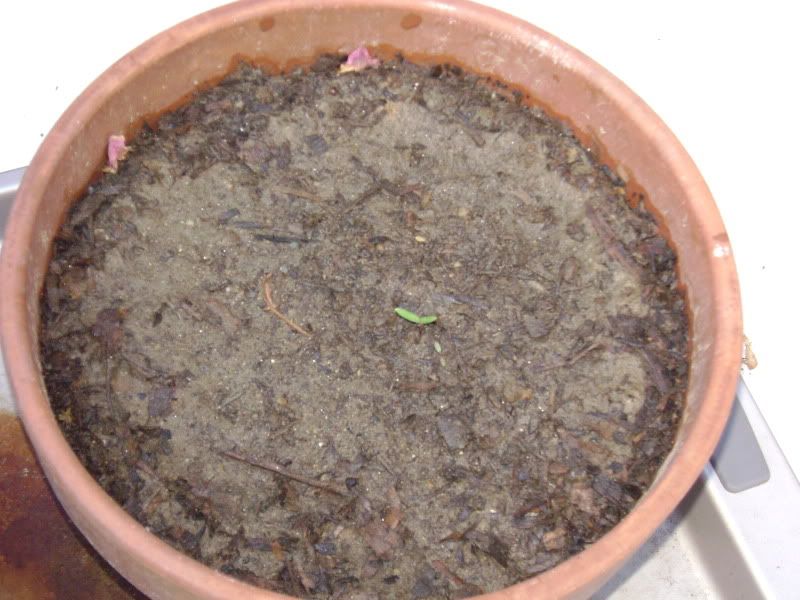
The two newspapers with the holes ripped in the center are mulch for my zucchini plants. If you look closely, there's a seedling in each hole. One of them is a Ronde de Nice, the other is a Raven. The little sticks sticking up around it are where I've planted onions. Those haven't come up yet either. :(

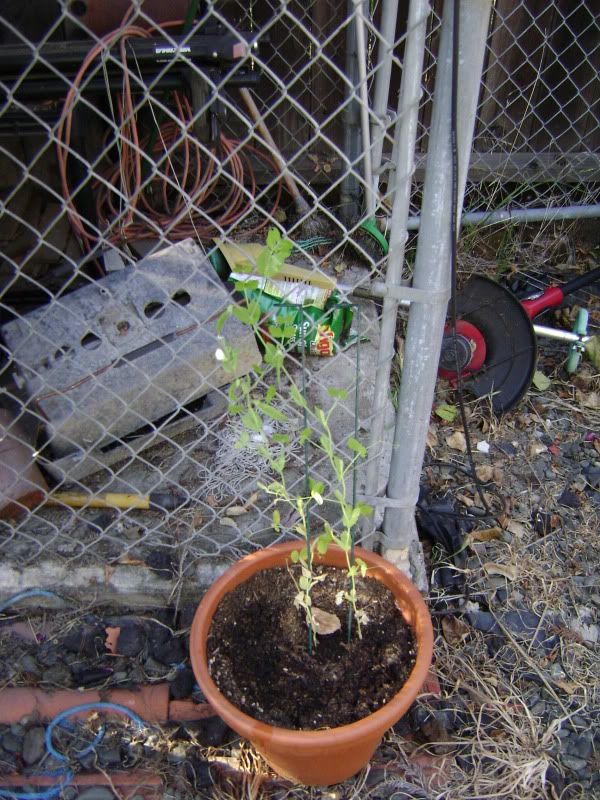
I also have various containers growing... I don't have pictures of the strawberries or herbs yet, but I do have pictures of my peas. I did some peas in pots when I realized that the boxes weren't going to be done in time for me to plant the peas in those. I started all three pots at the same time, but then snails got the peas in the first two pots, so I had to start them again. You can tell the third pot because it's so much larger than the rest. The third even has some pea pods already!


I also have some memorial-type flowers going.

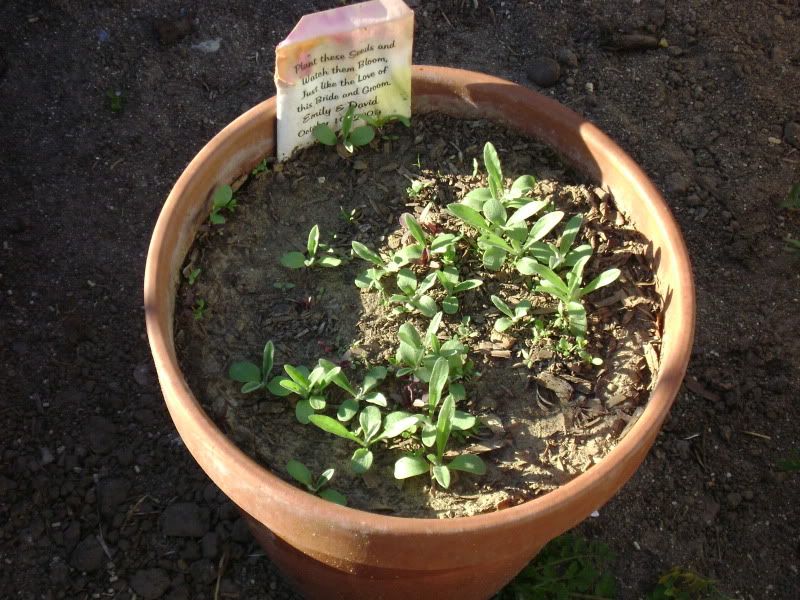
When my friend Emily got married last year, some of the favors at the reception were packets of wildflower seeds. Well, here's what one of those packets is doing:


And then early last year, both of my paternal grandparents passed away within months of each other. We managed to make it out for my grandmother's memorial service and interring both of them. With the cards we passed out at my grandma's memorial service was a little paper card with flower seeds embedded in it. I was the lucky one who kept it, and I planted it this year. So far, this is what it's doing:


It's actually not bad. The card that it came on said it would take about 4-6 weeks for it to sprout, and it's only been like 3.

And that's it for now! I'll keep updating the blog as things happen and the season moves forward!

Monday, February 1, 2010

Knitting project information! Arbor VBDs.

So I started knitting a top last week. It's from a pattern called Arbor and combines a lace bodice with a cabled-rib bottom part, all with a bunch of negative ease (meaning the top is smaller around than I am, thus has to stretch to fit around me). I'm not exactly going by-the-pattern on this one because I really want to make it fit me like a glove. Plus, I'm using a different weight yarn than the pattern calls for, so I have to adjust it anyways to make up for that.

Amongst the techniques I'm going to use in it are bust darts. These should provide enough space for the girls up front without having it baggy and saggy everywhere else on me. The size of the girls coupled with my particular frame proportions means that I really need the darts to make anything fit. (Store-bought clothes can be baggy in the shoulders/back and too small in the bust at the same time on me. Not fun.) There are two types of bust darts in the knitting/crochet world: Vertical Bust Darts (VBDs for short) and Horizontal Bust Darts (HBDs for short).

VBDs are where stitches are added (via increases, usually) to the front chest part of a top to create a wider fabric to go around the girls, then gotten rid of (decreased away, usually) once we're past the girls. HBDs are usually formed by using short rows, and they make the front part of the top longer than the back, to counteract the way tops will ride up in the front on women with big girls (because the girls take up extra length as well as width).

As I was knitting Arbor, I found that I only needed to do VBDs. I had planned on doing both kinds, but the HBDs really were unnecessary.


Technical Notes

I needed to increase 7 stitches on each side. For the increases, I used a pair of increases that Knitting Help used to have on their site, called Right/Left Lifted Increases. Unfortunately, Knitting Help seems to no longer have the instructions for them (or indeed, any mention of them at all) on their website. TECHknitting has instructions for what I learned as the Right Lifted Increase (RLI for short) on her blog, though. And here's how to do the Left Lifted Increase (LLI) using TECHknitting's color shorthand from the RLI pictures: knit into the green stitch and drop it off of the needle, reach down and pull the left side of the red stitch onto the left needle, then knit into the red stitch, dropping the red stitch off of the needle. This forms the exact opposite of the RLI.

In order to try to make what I did understandable, I'm going to refer to each stitch column in the lace chart by number (1 being the rightmost column in the lace and 20 being the leftmost column), and the columns added-in by the increases will be labeled with a letter in addition to the number of the column they came from (i.e. 1, 2, 3, 3a, 4, 5, 6... with 3a being from column 3). I am also using all standard abbreviations as they appear in the pattern, and so will only explain the shorthand I'm adding in myself. The instructions will be a lot clearer if you have the pattern in front of you, so if you don't already have a copy go click on the link up in the first sentence of this post and download a copy--it's free!

Now, I was following the instructions listed as XS, except that I ended up with a M over the widest part of my bust, then decreased back down to an XS in the front by the time it reached the cable rib.


Directions

Follow the cast-on directions for the XS yoke. When you reach the first time for row 1 of the lace chart (as opposed to 1a), you start the VBD increases.
Row1: Knit the first 3 lace repeats as the chart shows. On the forth repeat (from now on called the Right Dart Lace or RDL), do a LLI on stitch 11 (creating 11a). Knit two more lace repeats as the chart shows. On the seventh repeat (from now on called the Left Dart Lace or LDL), do a RLI on stitch 11 (creating 11b). Finish off the last three lace repeats as the chart shows.
Row 2 and all other even rows: Follow the lace pattern as established, purling the purls an knitting everything else.
Row3: In RDL, do a LLI on stitch 11a (creating 11c). In LDL, do a RLI on stitch 11b (creating 11d).
Row5: In RDL, do a LLI on stitch 12 (creating 12a). In LDL, do a RLI on stitch 10 (creating 10a).
Row7: In RDL, do a LLI on stitch 13 (creating 13a). In LDL, do a RLI on stitch 9 (creating 9a).
Row9: In RDL, do a LLI on stitch 14 (creating 14a). In LDL, do a RLI on stitch 8 (creating 8a).
Row11: In RDL, do a LLI on stitch 15 (creating 15a). In LDL, do a RLI on stitch 7 (creating 7a).
Row 13: In RDL, do a LLI on stitch 15a (creating 15b). In LDL, do a RLI on stitch 7a (creating 7b). RDL and LDL should now contain 27 stitches each.

Row14 is where the stitches for the arm are put on waste yarn, and more stitches are cast on for underneath the arm. The remaining increases are casted on here. So instead of the way it's writting in the pattern, instead it goes:
K 27 sts in pattern, slip 46 sts onto a piece of waste yarn, cast on 7 sts, pm, cast on 1 st, pm, cast on 11 sts, K 68 sts in pattern, slip 46 sts onto a piece of waste yarn, cast on 11 sts, pm, cast on 1 st, pm, cast on 7 sts, K 27 stitches. There will now be 160 stitches on the needle. The single stitches sandwiched between stitch markers are purled each round, and I dropped them to do EZ's faux seam technique on them. The stitches that form the first and last 34 stitches are the back, and match the count for an XS. The 90 stitches in the center (between the two seam stitches) are the front, and match the stitch count for a M.

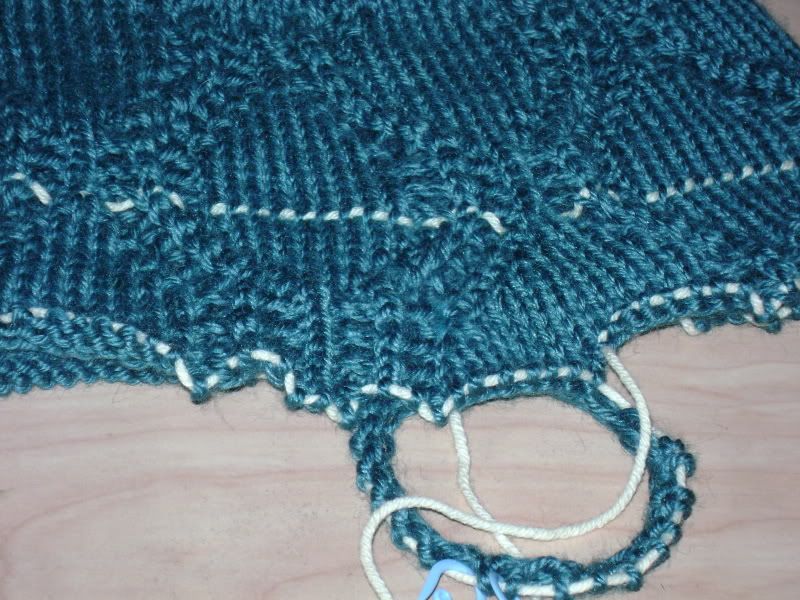
The increases should look something like this:


Follow the bodice directions for 10 rows. The next row should match up with row 25 on the lace chart. From there down to the cable ribbing, knit the back panels as the pattern directs and purl the seam stitches. The modified instructions here will only mention the front "half" of the top.
Row25: K2tog, knit in established pattern until the last two stitches of the front, SSK.
Row26 and all other even rows: Knit in established pattern.
Row27: K2tog, knit in established pattern until the last two stitches of the front, SSK.
Row1 and all odd rows through 17: Decrease one stitch at the edges of the front panel as established. (A right-leaning decrease on the right side and a left-leaning decrease on the left side.) Row 17 should end with 68 stitches in the front panel, matching the number in the back panel.

Follow the directions for an XS from here on out.

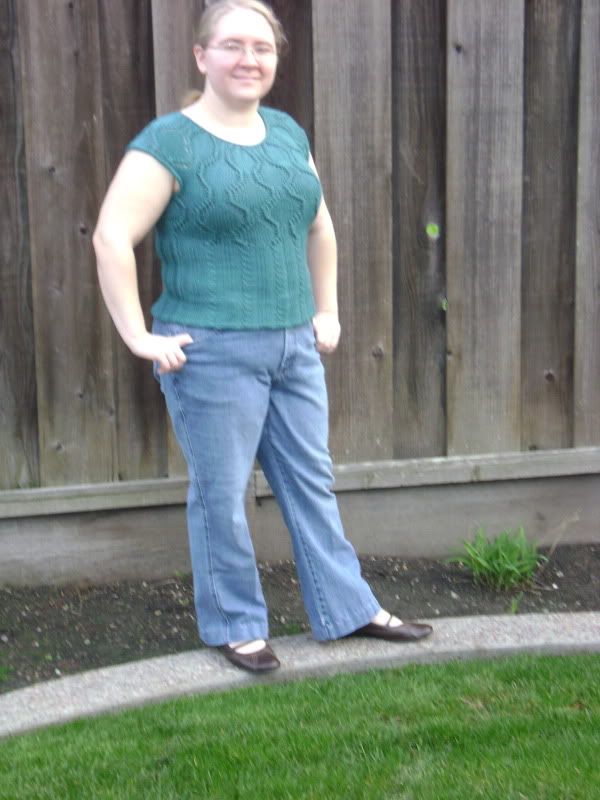
And here's a picture of the finished top!

Thursday, November 5, 2009

Bananaanadamarama Bread

One great tip I learned this year involved ripened bananas. Who hasn't bought a bunch, only to have one ripen past the munching point before you can finish the whole bunch? And one banana usually isn't enough to make banana bread with. Well, you can freeze those lone bananas until you have enough (and feel like) using them for bread, or whatever other application you have in mind. Frozen-and-thawed ripe bananas are actually easier to mash, even!
The biggest problem, however, can be figuring out what to do with all the bananas as they build up.

Well, one recipe that caught my eye was the Bananaanadamarama Bread at Baking Bites. If you couldn't tell, it's a banana-flavored version of anadama bread (anadama being a molasses-and-cornmeal bread from New England). I must admit that I have never had anadama bread before, so this is a completely new recipe for me. I stayed mostly true to the original recipe, ingredient wise. The only differences come from the fact that I have a rapid rise/bread machine yeast instead of active dry, and the banana mash I had ended up being close to 1 1/4 cups (if not a little more), so I left out the water in the recipe (having mis-read the recipe, and thinking that it called for 1/4 cup water instead of the actual 1 cup).

My mixing order was different, as well. I mixed all the dry ingredients together first, then added in the wet ingredients and just mixed with my plastic bench/bowl scraper and my hands. I got back on track with the recipe after the kneading (I tried a different technique, see below). Though after splitting the two loaves into two loaf pans I put one in fridge to bake a bit later, while leaving just the one loaf to rise and bake. One of the big reasons I did this is that I don't have two matching pans that are both the same size and the same material. With my 8"x4" loaf pans, one is glass and the other is dark non-stick metal. If I tried to bake the two of them together, one would likely burn while the other was still under-done.

I also tried a kneading technique I just heard of with this bread. Thanks to a fellow poster on Ravelry, I saw the no-extra-flour kneading technique from Chef Richard Bertinet (it's hosted on Gormet Magazine's website, but seeing as this month is their last month publishing, don't expect the video to be around long!) This method is for wet, sticky doughs and uses the dough's own stickiness to your advantage. You use whatever you normally knead on (clean counter top, or a clean plastic cutting board) without any extra flour, or oil, or whatever. You just use a plastic bench scraper. Though my actual dough was a bit drier than his so it didn't look exactly like what he did, but it did get the dough to a point where I could knead it the normal way without the dough sticking to the cutting board I use for kneading.

I didn't get the amazing oven spring from this bread that you would expect from a sandwich loaf, but it was nicely chewy and quite tasty. Molasses and banana were the main flavors, and melded together pleasantly. It's not a loaf I would make every week, but it's one that is definitely to be tried.

Thursday, October 29, 2009

Peanut Butter Buttercream Truffles


I am absolutely in love with See's Candy, especially their buttercream truffles. I'll eat almost every flavor of buttercream truffles (with the only exceptions being because of flavors I'm not fond of in general). So, in an effort to use up a giant jar of chunky peanut butter my grandmother gave me after she bought it accidentally (both of us use/eat creamy peanut butter in everyday use), I decided to try to make my own peanut butter buttercream truffles.

For the buttercream center, I used a modified version of Wilton's Peanut Butter Buttercream Icing. The main differences are that I was lackadaisical about measuring the powdered sugar (I actually measured out three cups pre-sifting, but after sifting that amount was closer to four cups. And I'm not sure my hand mixer could have handled any more powdered sugar in the mix, anyways.), and that I omitted the milk at the end.

The shell was simply melted down almond bark from the store (in the baking isle), with some sprinkles to give them a festive touch. I made these for Halloween, but you can make them for any occassion by just using whatever sprinkles you want.

I dipped my candies using two plastic spoons. One spoon was kept in the chocolate and used to pour chocolate over the center and to lift it out of the bowl, and then it was rolled onto the second spoon to get off excess chocolate, then deposited on wax paper with the second spoon. There are other methods for dipping out there, so feel free to use your favorite one!


The Recipe

Ingredients
1/3 cup solid vegetable shortening
1/3 cup butter
3/4 cup peanut butter (chunky)
1 tsp vanilla extract
3-4 cups powdered sugar, sifted
1 24 oz package almond bark (You'll only need 18 oz at most, though.)
Sprinkles as desired

Directions
Using a mixer, blend the shortening and butter together. Add the peanut butter and vanilla and blend. Add the powdered sugar one cup at a time until it becomes stiff. (It will reach the upper limit that a hand mixer can mix, if you're using one.) Cover and let chill a couple hours. (It will last in the fridge several days, though, so it's easy to make ahead.)

Use a small cookie scoop to scoop one-inch balls onto a wax paper-lined baking sheet. Once you've scooped them out, go back and compress and roll each ball so that they're a single solid mass and won't break apart while dipping.

Melt the almond bark according to package directions. Start out with 12 oz first, then melt more as needed. Dip the centers in the chocolate one at a time and replace on the wax paper. Immediately sprinkle on decorations if desired, because the shell will set up very quickly.

Let the chocolates set on the counter until the shells are completely set. I gave it overnight just to be completely sure. Then enjoy!

Yield: About 4 dozen.