Showing posts with label baking:cookies. Show all posts

Saturday, October 24, 2009

Orange You Glad It's Halloween Cookies


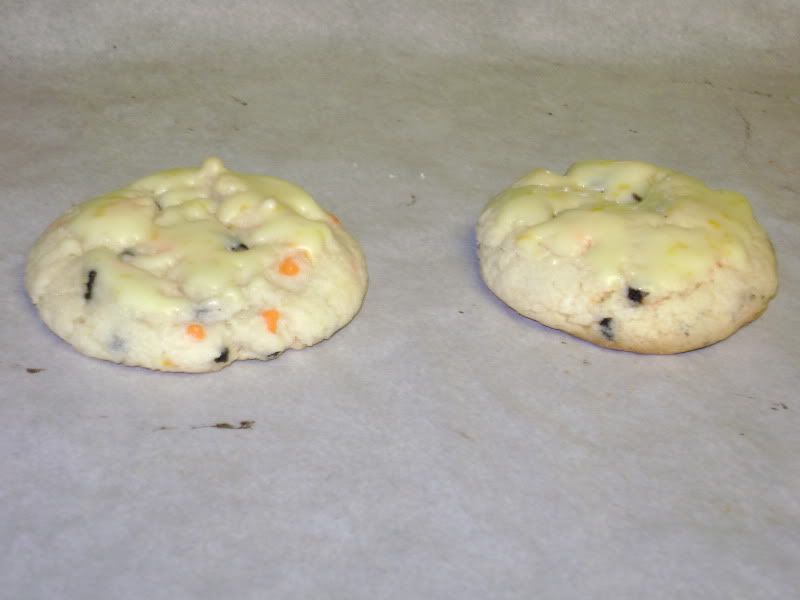
I must admit, it was the cake mix that inspired these cookies. I love the idea of the funfetti cake mixes, especially the holiday ones. So when I saw a box of Halloween-themed funfetti on sale, I had to grab it. And then I started thinking of how I could tinker with the basic box to make it a little more special... And oranges are orange (duh!) and Halloween colors are classically black and orange, so it popped into my head to make these orange-flavored.

The orange flavor in these cookies comes from two sources: orange zest and orange juice. There's orange zest in the cookie itself that lends a subtle flavor, but the real punch comes from the orange glaze. The glaze lets these cookies balance that fine line of being sweet enough for the kids, while not going overboard. These are perfect for a quick dessert for a holiday party, or to just munch on yourself while passing out candy to adorable little kids.


The Recipe

Ingredients
18 oz funfetti cake mix (I used Pillsbury Halloween Funfetti Cake Mix)
1 stick butter (1/2 cup), softened
1 egg
1 orange
1 cup powdered sugar

Directions
Preheat oven to 350 degrees. Place butter, egg, and half of the zest from the orange into a large mixing bowl and beat together. Add in the cake mix and the colored sprinkles and stir until it comes together. (If you used a hand-mixer for beating, switch to a spoon for adding the dry goods--the batter's much too thick for a hand-mixer.) Scoop dough onto a sheet pan lined with parchment paper, leaving 2 inches between each cookie. Bake 9-12 minutes, or until the edges turn golden brown. Remove from the oven and let cook on the sheet for 2 minutes, then transfer to a cooling rack.

Meanwhile, place powdered sugar and the rest of the orange's zest in a small mixing bowl. (The bowl should be just large enough for you to fit your hand in while holding the edges of a cookie.) Slowly add juice from the orange until the glaze is a good dipping consistency. For me, this was about half the orange's juice. Once the cookies are cool enough that you can pick them up without them threatening to fall apart, you may start to dip them in the glaze. I placed the cooling racks stacked over a now-empty baking sheet still covered with the parchment paper to catch any drips.

You can serve anytime, right away if you want the glaze to be still gooey, or you can wait until it's hardened and serve then. Either way they're delicious!

Monday, October 19, 2009

Chocolate Lava Cookies


I've heard lots about chocolate lava cakes, but not much about cookie versions. While looking around at recipes for chocolate lava cakes, I found plenty that call for creating the "lava" by either putting a ball of ganache in the center of the dough, or under-baking the cake. I didn't want to under-bake my cookies and I don't have all the required ingredients on hand for ganache, so I experimented to find another way to make the molten center with what I did have on hand.

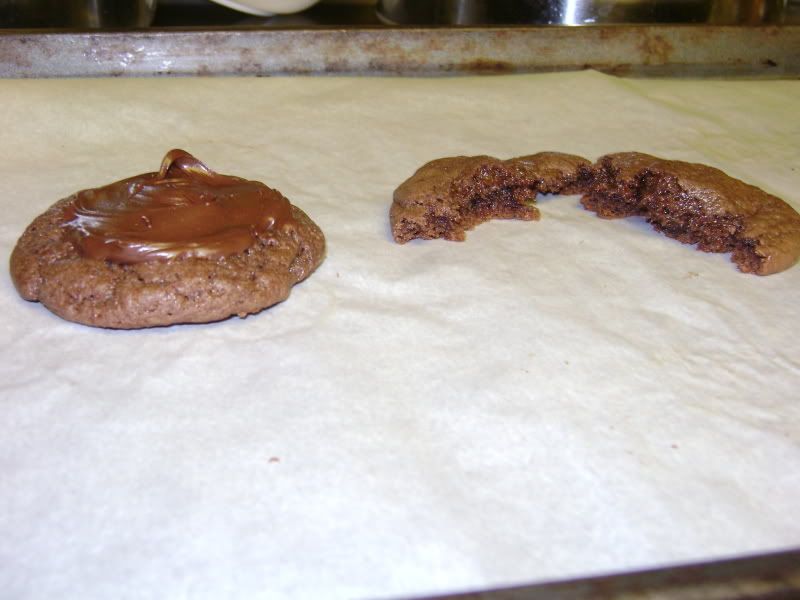
These cookies are relatively simple in theory, and require few ingredients. The "lava" itself is not what you would find in a classic chocolate lava cake. To use geologic terms, a chocolate lava cake would be more mafic (thin and runny, think of the lava coming off of Kilauea) while these cookies have a more felsic lava (very thick and sticky, more like Mt. St. Helens). As far as the cookie is concerned, it means that it won't ooze out if you break the cookie in half, but you will get an explosion of liquid chocolate in your mouth when you bite into it.

This particular cookie dough is very sticky, so it's best to work with it chilled, and with latex gloves on. If you don't have food-grade latex gloves, you can do like I did and use a piece of plastic wrap, but that is more challenging. As far as the filling goes, you can keep it slightly warmed up and pipe it into the center, or you can just slightly chill it and roll it into a ball to put in the center of the cookie dough. The leftover filling can be drizzled over the finished cookies or used to frost a small number of them.

These cookies are best eaten warm and fresh from the oven, for the ultimate oozy-chocolate experience. If, unfortunately, you don't happen to make it in time, you can microwave it for a short amount of time and eat the newly-warm cookie right away.


The Recipe

Ingredients
18 oz chocolate cake mix (I used Betty Crocker Super Moist Milk Chocolate, but a more intensely-chocolate flavor would be better.)
1 stick butter (1/2 cup), softened
1 egg
1 tsp vanilla extract
1 Tbsp + 2 tsps water
1/2 cup semi-sweet chocolate chips
1 tsp shortening

Directions
Place butter, egg, vanilla, and water in a bowl and beat together. (Tip: I just estimated the vanilla in a tablespoon measure and filled up the rest of the measure with water.) Add in the cake mix and stir--the batter will be very stiff and sticky. Cover and chill the batter.

In a microwave-safe bowl, melt together the chocolate chips and shortening in 30-second rounds, stirring after each time, until just barely melted. The chocolate will smooth out as you stir it.

Preheat your oven to 350 (325 if using a dark sheet) and line your baking sheet with parchment paper or a silicone mat. Working quickly, scoop out 1" balls of dough and roll them smooth, then press a deep hole in the center with your thumb. Place some of the filling in the center. Bring the dough around the filling and seal securely. Place the balls of dough on the cookie sheet, no less than 2 inches apart. Bake for 9-12 minutes until done. Let cool one the sheet for 2 minutes, then remove to a wire rack until they're just cool enough that you can pick them up with your hand without them falling apart. Serve immediately.

Yield: About 2 dozen.

Another picture.